Water damage demands immediate, organized action; the first steps you take determine restoration success. Secure safety, stop the water source, and document damage for your insurer. Move valuables to dry areas, extract standing water, ventilate and dehumidify to limit mold, and contact qualified restoration professionals for assessment and repairs so your property is stabilized and recovery proceeds efficiently.
Key Takeaways:
- Stop the hazard and secure the area – cut power to affected zones, shut off the water source if possible, and evacuate if there’s contamination or structural instability.
- Remove standing water and start drying immediately (ideally within 24-48 hours) using pumps, wet vacuums, dehumidifiers, and airflow to reduce mold risk.
- Document damage, move and protect salvageable belongings, contact restoration professionals for structural and mold inspections, and notify your insurer promptly.
Understanding Water Damage
Types of Water Damage
You’ll face three categories of water: Category 1 (clean water from supply lines or rain), Category 2 (gray water from appliances containing contaminants), and Category 3 (black water from sewage or floodwaters with pathogens). You should note that Category 1 can degrade into Category 2 or 3 within 48-72 hours; porous materials like drywall and carpet absorb quickly, while concrete and metal show delayed effects. Use these distinctions to set PPE, containment, and disposal protocols.
| Category 1 | Clean sources: burst supply lines, rain; low immediate health risk but degrades in 48-72 hrs |
| Category 2 | Gray water from dishwashers, washing machines; contains soaps, bacteria; requires filtration and disinfection |
| Category 3 | Sewage/floodwater with fecal matter and pathogens; needs full PPE, removal of affected materials, professional remediation |
| Material response | Drywall softens in 12-24 hrs, wood warps in days, insulation traps moisture and promotes mold within 24-48 hrs |
| Health & safety | Black water carries GI pathogens; use N95/respirator for mold or sewage, HEPA filtration for cleanup |
- Identify the source and stop the inflow immediately when safe to do so.
- Isolate the affected zone and cut power to wet areas to prevent electrical hazards.
- Wear appropriate PPE for the water category-gloves, eye protection, respirator for Category 3.
- Document damage with photos and measurements for insurance and remediation planning.
- After documenting, contact a licensed restoration specialist for contaminated losses and mitigation planning.
Assessing the Severity
You assess severity by combining water category, square footage affected, and material saturation: classify as small (<10 sq ft), moderate (10-100 sq ft), or extensive (>100 sq ft). You should use moisture meters and infrared imaging to map hidden intrusion, and log RH and temperature-aim to begin drying within 24-48 hours to limit mold growth and secondary damage.
You’ll perform targeted tests: pin and non‑pin moisture meters across flooring, walls, and structural members; hygrometers to track room relative humidity (target <60% during drying); and infrared scans to locate cold, wet areas. For example, a flooded basement with >100 sq ft of saturated drywall and RH >75% requires deconstruction of insulation and drywall plus commercial dehumidifiers (50-100 pints/day) and multiple air movers delivering >2,000 CFM total. You should also record baseline readings, time-stamp photos, and note odors or visible microbial growth to inform containment level, PPE, and when to involve industrial hygienists for air sampling.
Immediate Actions to Take
Act fast to limit spread: cut power at the main breaker if water reaches outlets or appliances, and shut off the supply when possible to prevent further loss-mold can begin growing within 24-48 hours. If you need stepwise guidance for cleanup and recovery, consult Water Damage Restoration: Your Step-by-Step Guide to Recovery for practical next steps.
Safety Precautions
Prioritize your safety by turning off electricity before entering flooded areas and avoid wading through standing water until the power is confirmed off. Use protective gear-rubber boots, heavy gloves, eye protection, and an N95 or higher respirator for contaminated water-and keep children and pets out; contaminated grey or black water can contain bacteria, sewage, and chemical hazards.
Stopping the Source of Water
Locate and close the nearest shutoff valve or the home’s main water valve immediately; a continuous supply can discharge hundreds of gallons in an hour, so cutting flow within minutes dramatically reduces damage and cleanup scope. If the source is a fixture, turn the local shutoff under sinks or behind toilets before shutting the main.
Search for your main shutoff near the water meter, typically in the basement, crawlspace, utility room, or at the curb; use a wrench if the valve is stiff. In multi-unit buildings contact the building manager or utility for the master shutoff. If a valve breaks or you can’t access it, call an emergency plumber right away and, if necessary, the water utility to stop flow at the meter to prevent further flooding.
Contacting Professionals
When water intrusion exceeds a mop-and-bucket fix, you should contact certified restorers who can quickly assess contamination, structural risk, and drying scope; many firms respond within 1-4 hours for emergency calls. You can review proven Immediate Steps To Take After Water Damage practices at Immediate Steps To Take After Water Damage while you prepare photos and basic damage notes for faster triage.
When to Call for Help
Call immediately for standing water over one inch, visible mold, sewage or Category 3 water, compromised electrical systems, or structural sagging; these conditions raise health risks and insurance timelines. If odor or moisture persists after 24-48 hours, you should also bring in professionals to prevent mold growth and escalation of repair costs.
What to Expect from Restoration Services
Expect an initial inspection with moisture meters and thermal imaging, a written scope, rapid water extraction using truck-mounted pumps, placement of air movers and dehumidifiers, and antimicrobial treatments; full drying commonly takes 3-7 days depending on materials and square footage. Technicians will document conditions and provide a mitigation timeline for your insurer.
More specifically, crews deploy truck-mounted extractors, LGR or desiccant dehumidifiers, and HEPA air scrubbers tailored to room volume and material class; controlled demolition may occur for saturated drywall or insulation. Look for IICRC certification on crews, daily moisture logs, and post-drying clearance readings to ensure restorations meet industry thresholds before repairs begin.
Documenting the Damage
Photograph every affected area from at least four angles-wide shots for context and close-ups for texture and serial numbers-and record video of active leaks or rising water to show movement. You should note room names, measurements and moisture-meter readings, and timestamp files before uploading copies to cloud storage and a USB drive. Keep receipts for emergency supplies and any temporary repairs so you can match expenses to photographed damage.
Importance of Documentation
Thorough records let you and contractors quantify scope quickly and avoid scope creep during remediation. Label photos by room and date, include a short inventory for each space, and attach measurements or moisture percentages where possible. Organized evidence speeds adjuster reviews, supports accurate estimates, and reduces back-and-forth; aim for a folder with 20-40 images plus 1-2 short videos for a typical single-family home loss.
Insurance Claims
Notify your insurer promptly-ideally within 72 hours-and open a claim to get an assigned claim number. When filing, submit dated photos, videos, a room-by-room inventory with purchase dates or serial numbers, and receipts for emergency mitigation like fans or hotel stays. Keep a log of all communications (agent name, date, time) and upload documentation to the insurer’s portal or email it as instructed to avoid delays.
When the adjuster is scheduled, be present and present an organized binder or zipped file containing chronological photos, moisture readings, contractor estimates, and receipts. Obtain 2-3 written estimates from licensed restoration contractors to compare scope and pricing; many policies reimburse reasonable emergency mitigation costs if you keep receipts. If coverage is disputed, consider hiring an independent public adjuster-your documentation and contractor quotes will be the strongest leverage during negotiation or appraisal.
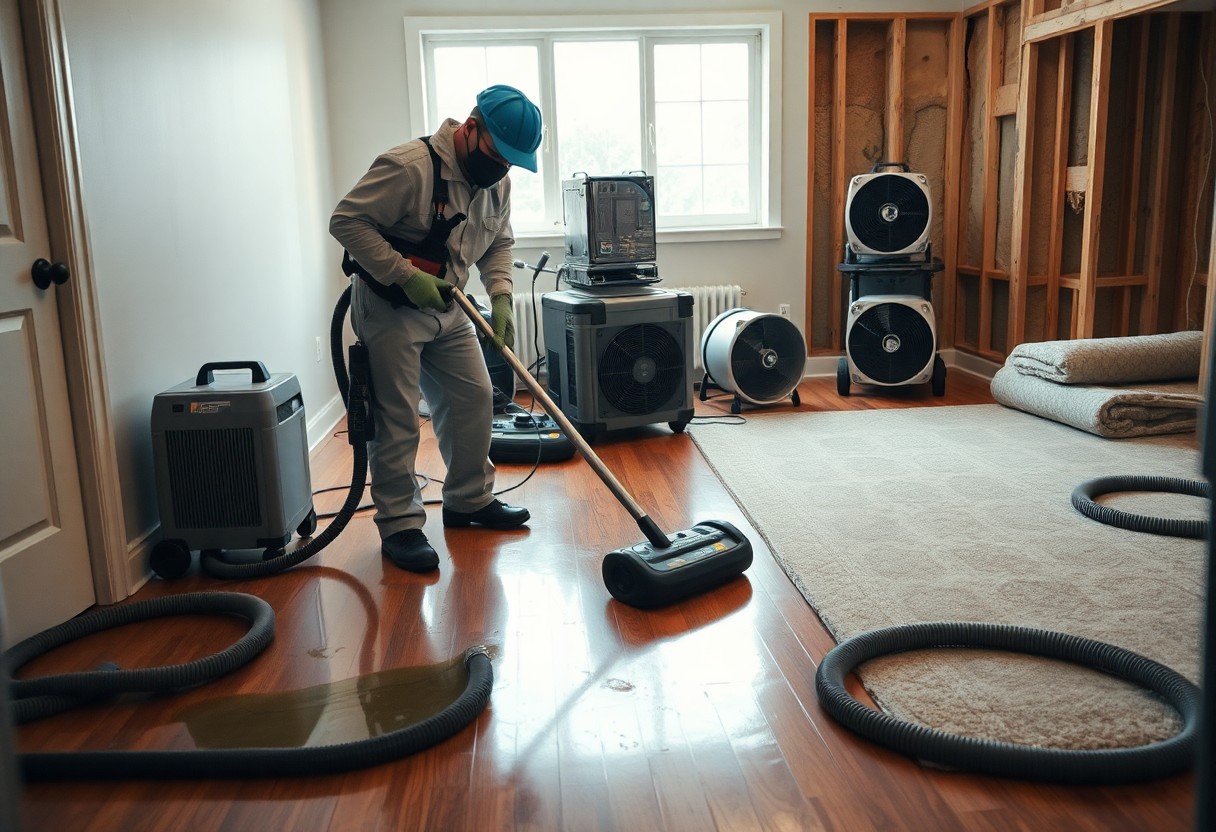
Drying and Dehumidification
After documenting and categorizing damage, move quickly to drying and dehumidification to stop secondary damage; mold can begin within 24-48 hours, so you should reduce relative humidity below 50% and raise room temperatures to 70-80°F to aid evaporation. Use a combination of air movers and dehumidifiers to achieve 4-6 air changes per hour in affected spaces, and monitor moisture with a hygrometer and moisture meters every 4-12 hours until readings stabilize.
Effective Drying Techniques
For effective drying, position low-profile air movers 12-24 inches from walls at a 45° angle to create laminar airflow and accelerate evaporation; typical units deliver 1,200-3,500 CFM. You’ll pair these with refrigerant dehumidifiers for warm, humid environments and desiccant units when temperatures drop below ~45°F. Implement cavity drying-inject dry air into wall voids or use drying mats under carpets-to target trapped moisture, and verify progress with moisture meters and thermal imaging.
Tools and Equipment Used
You should rely on air movers, refrigerant and desiccant (LGR) dehumidifiers, hygrometers, pin and pinless moisture meters, and thermal cameras to track and remove moisture. Portable pumps handle standing water-submersible models often pass 1-2-inch solids-and HEPA vacuums control particulates during demolition. Drying mats, injectidry systems, and negative air machines let you address flooring, wall cavities, and containment when contamination is present.
You’ll find LGR (low grain refrigerant) dehumidifiers commonly remove 40-150 pints/day under AHAM testing (80°F/60% RH); refrigerant units lose efficiency below ~60°F, whereas desiccant machines perform reliably in cold conditions and can achieve very low dew points for rapid drying. Air movers typically provide 1,200-3,500 CFM each; deploying multiple units and properly balancing dehumidification can reduce drying times by days in large, water-saturated structures.
Preventing Future Water Damage
After repairs, prioritize proactive measures: grade soil to slope at least 6 inches over the first 10 feet away from your foundation, clear gutters twice a year, and install a battery-backed sump pump plus a backflow preventer on sewer lines. You should also upgrade to water-resistant finishes in basements and add smart flood sensors for instant alerts – see A Complete Guide to the Water Damage Restoration Process for detailed procedures and checklists.
Maintenance Tips
Maintain vigilance with scheduled checks: test your sump pump monthly and after storms, inspect appliance hoses and replace every 3-5 years, service HVAC and condensation drains annually, and inspect roof and flashing after major weather events. Recognizing small stains, musty odors, or humidity above 60% lets you intervene before damage escalates.
- Clean gutters and downspouts twice yearly and ensure downspouts discharge 6-10 ft from foundation.
- Test sump pump monthly; install a battery backup and check the check valve.
- Replace washing machine and dishwasher hoses every 3-5 years; use stainless steel braided hoses.
- Inspect foundation grading annually; maintain at least 6 inches drop over 10 feet.
- Service HVAC yearly and clear condensate lines to prevent overflow.
Upgrades and Improvements
You can significantly lower repeat incidents by installing a battery-backed sump pump ($500-$1,500 typical), a sewer backflow preventer ($300-$700), and flood sensors ($20-$150). Swap porous basement finishes for tile or cement board, replace aging polybutylene plumbing, and consider a perimeter French drain to redirect groundwater away from your foundation.
When choosing equipment, match pump capacity to basement square footage and anticipated inflow; professionals size pumps using expected GPH and required discharge head. Route discharge lines beyond the property line with a check valve and frost protection, and pair mechanical upgrades with material changes-closed-cell insulation, cementitious coatings, and raised electrical outlets-to create layered protection that reduces repair frequency and insurance claims after one retrofit project reduced monthly basement seepage to zero for a homeowner in a high water-table area.
Summing up
From above, you should prioritize safety by shutting off electricity and stopping the water source, remove standing water and salvage your valuables, ventilate and dehumidify affected areas, document damage for insurance, and contact restoration professionals quickly to assess your property and begin drying to prevent mold and structural deterioration.