Most people assume water damage only needs drying, but you should distinguish remediation-which removes hazards like contaminants, sewage, and mold-from restoration, which repairs structures and returns your property to pre-loss condition; understanding these roles helps you choose appropriate services, document claims, and protect your health and investment effectively.
Key Takeaways:
- Remediation focuses on identifying and removing hazards (mold, contaminants, sewage) and containing affected areas to stop ongoing damage; restoration rebuilds, repairs, and returns the property to its pre-loss condition.
- Typical remediation steps: inspection, testing, containment, and decontamination; typical restoration steps: drying, structural repairs, reconstruction, and content restoration.
- Remediation is an immediate safety and contamination-control response; restoration is a longer-term recovery process that follows once the environment is safe, often involving different specialists and equipment.
Understanding Water Damage
When water reaches building materials, you must evaluate visible and hidden indicators: staining, warping, elevated moisture readings, and early mold spots. For instance, a burst supply line can push drywall moisture above 20% within 24 hours and allow mold colonization in 48-72 hours. Prioritize shutting off the source, documenting loss for claims, and beginning controlled drying to limit secondary damage.
Types of Water Damage
You’ll classify incidents by contamination and impact: Category 1 (clean water) from supply lines, Category 2 (gray water) with chemical or biological contaminants like appliance overflows, and Category 3 (black water) such as sewage or floodwater; each category dictates PPE, disposal, and remediation scope. Surface issues can remain cosmetic, but structural involvement means removal and reconstruction of affected assemblies.
- Category 1 – clean water: broken supply lines, low contamination risk.
- Category 2 – gray water: dishwasher or washer overflow, moderate contamination.
- Category 3 – black water: sewage or river flood, high contamination requiring disposal.
- Surface damage – stained finishes, swelling trim; often repairable without full teardown.
- This structural damage – compromised studs, subfloors, or joists that usually need removal and replacement.
| Category 1 (Clean) | Example: broken supply pipe; Action: extract water, dry within 24-48 hrs to avoid mold. |
| Category 2 (Gray) | Example: washing machine overflow; Action: remove porous materials, use PPE, disinfect surfaces. |
| Category 3 (Black) | Example: sewage or floodwater; Action: full removal, licensed remediation, HEPA filtration and disinfection. |
| Surface Damage | Example: paint stains or swollen baseboards; Action: clean, sand, refinish within days to prevent spread. |
| Structural Damage | Example: rotted joists or delaminated subfloor; Action: remove affected framing, replace; repairs can exceed $5,000. |
Causes of Water Damage
You often trace damage to burst pipes (freeze-thaw events), slow pinhole leaks, appliance failures-water heaters and washing machines account for roughly 30% of household water claims-roof or flashing failures after storms, and groundwater intrusion during prolonged heavy rain. Human error, like closed gutters or failed maintenance, accelerates risk and severity.
Insurance data shows aging plumbing and joint failures account for about 25-30% of residential losses, and winters with extended sub-freezing stretches increase burst-pipe incidents by up to 40%. To mitigate risk you can install leak sensors, automatic shutoffs, and insulate vulnerable piping; regularly inspect appliance connections and roofs, and act within 24-48 hours on any persistent dampness to limit mold and structural degradation.
What is Water Damage Restoration?
When your property suffers water intrusion, restoration is the end-to-end process that returns structures and contents to pre-loss condition. You’ll see professionals assess damage categories (Category 1-3) and classes (Class 1-4), remove standing water, dry materials, apply antimicrobial treatments, and rebuild where needed. Typical timelines range from 24-72 hours for drying to several weeks for repairs, depending on contamination level and structural damage.
Process of Restoration
Inspection and documentation start the job: you’ll get moisture mapping with hygrometers and thermal imaging, plus IICRC protocols guide decisions. Technicians use truck-mounted extractors, 6-12 air movers, and refrigerant or desiccant dehumidifiers to lower moisture; extraction often removes 90-95% of standing water before focused drying. Finally, materials are sanitized, monitored daily for moisture reduction, and repaired or replaced based on measured targets.
Importance of Professional Restoration
Hiring certified technicians protects your health and your property: professionals contain contaminated (Category 2-3) water, reduce mold growth risk by addressing moisture within 24-48 hours, and supply documented loss reports insurers expect. Without proper equipment and protocols you risk hidden structural deterioration, prolonged downtime, and potential claim denials.
For example, after a second-floor pipe rupture in a suburban home, a restoration crew deployed six air movers and two dehumidifiers and dropped wall-cavity moisture from 18% to a target 8% within 48 hours, avoiding a full mold remediation. You’ll gain faster occupancy, clearer insurance settlements, and verifiable moisture readings proving work met industry standards.
What is Water Damage Remediation?
When sewage, storm surge, or backed-up drains introduce contaminated water, remediation is the emergency work that makes your space safe again: containment, removal of hazardous materials, sanitation and mold prevention. Professionals follow IICRC S500 guidelines, use PPE and HEPA filtration, and act within 24-48 hours to stop microbial growth-mold can begin colonizing in that window. You benefit from rapid source control, tested decontamination, and documented measures that insurers require for Category 2-3 water events.
Process of Remediation
First responders assess contamination level and source, then establish containment and negative air if needed; next comes bulk water extraction with truck-mounted pumps, moisture mapping using meters and infrared, and setting axial fans plus dehumidifiers for 24-72 hours. You’ll see removal of non-salvageable porous materials, HEPA vacuuming, antimicrobial application, and proper disposal of biohazard wastes. Technicians document moisture readings and photos until drying goals and air-quality benchmarks are met.
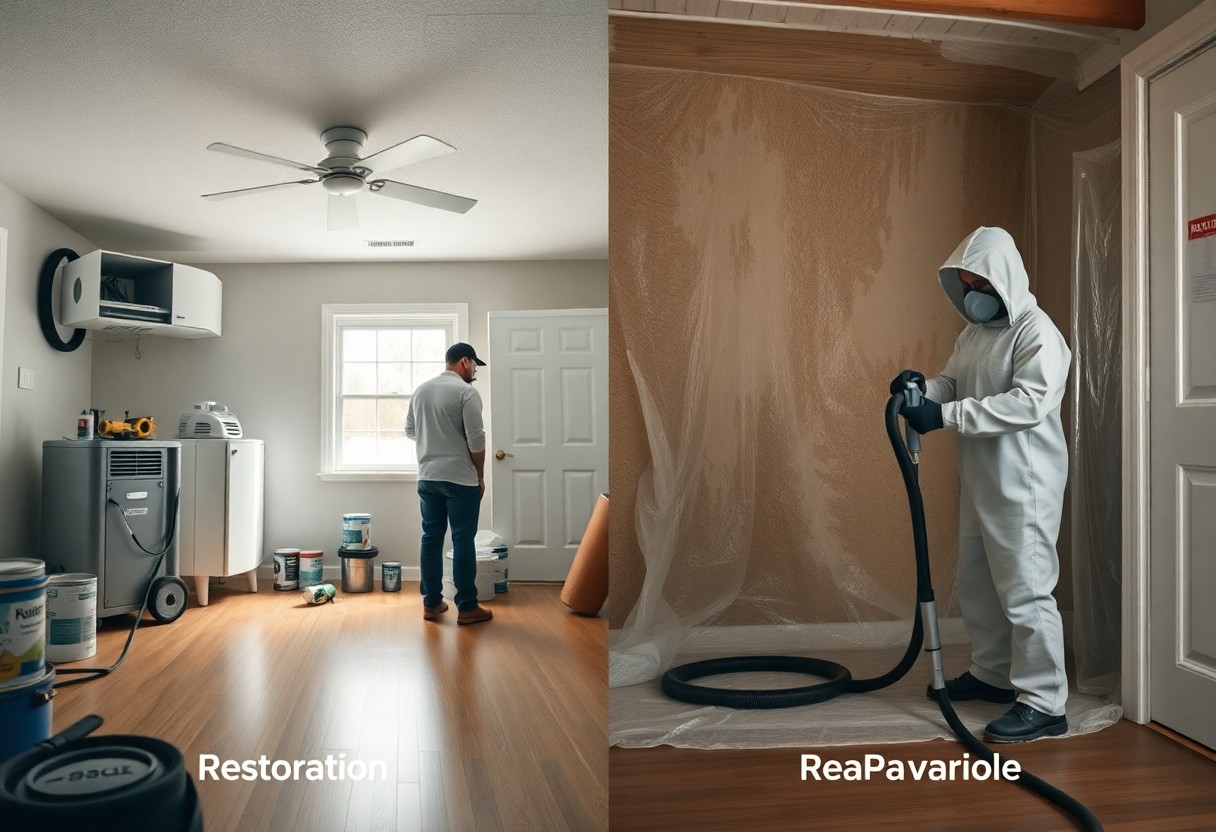
Key Differences Between Remediation and Restoration
In practice, remediation is safety- and contamination-focused emergency action, while restoration is the rebuilding phase that returns form and function. You get remediation to eliminate hazards, stabilize structures, and halt microbial growth; restoration then repairs drywall, flooring, cabinets and finishes. Remediation follows health standards and testing; restoration follows building codes, permits and cosmetic scope, often handled by different licensed contractors.
For more detail, remediation sets measurable endpoints-drying goals, negative pressure, ATP or microbial tests-and produces the documentation insurers want; restoration relies on those records to estimate repair scope, secure permits and schedule trades. You’ll typically see remediation completed in days, restoration spanning weeks to months depending on reconstruction, and different cost lines on claims reflecting emergency abatement versus rebuild work.
Common Myths About Water Damage
Don’t assume visible drying equals safety; within 48-72 hours microbial colonization can begin, and contaminated incidents need containment and testing beyond fans. If you’re weighing options, consult a side‑by‑side like Water Remediation vs. Water Damage Restoration to understand why remediation protocols differ from routine restoration.
Misconceptions About Water Restoration
Many homeowners think restoration is just drying and replacing finishes; you should expect documented moisture mapping, industrial dehumidification, and measurable targets-dryback verification often occurs within 24-72 hours. Contractors typically handle structural repairs, floor and drywall replacement, and odor control, so demand a written scope and moisture goals before work begins.
Misconceptions About Water Remediation
People often assume remediation equals heavier cleaning, but when you’re facing Category 2 or 3 water, remediation uses containment, negative air, HEPA filtration, PPE, and selective demolition; porous materials frequently must be removed to eliminate biohazards. Acting quickly-within that 48-72 hour window-reduces microbial spread and limits necessary demolition.
For more detail, note that remediation usually includes microbial testing and post‑remediation clearance, not just visible cleanup; you should require lab reports, documented protocols, and clearance criteria when sewage or floodwaters are involved, because inadequate remediation can leave hidden contamination that resurfaces during humidity swings or after new finishes are installed.
When to Call for Help
If water sits in your home more than 48 hours, you smell persistent mustiness, or you encounter sewage, call a pro immediately – these situations often require containment, testing, and safety controls. For a deeper comparison of services and when to escalate, see Water & Mold Restoration vs. Remediation: The Differences.
Signs You Need Restoration
You need restoration when visible signs include warped hardwood (cupping or buckling), delaminated laminate, sagging drywall, pooled water in basements or crawlspaces, or electronics and appliances exposed to moisture; if water affected more than 10 sq ft or has been present over 48-72 hours, professionals should handle drying, dehumidification, and repairs to prevent long‑term structural and material loss.
Signs You Need Remediation
You need remediation when you find sewage (Category 3), floodwater from outside, widespread visible mold (greater than 10 sq ft per EPA guidance), HVAC contamination, or occupants with compromised immune systems – these demand hazard removal, containment, and specialized cleaning beyond standard drying and repair.
In practice, remediation often means testing, negative‑air containment, HEPA filtration, and removing porous materials such as insulation, carpeting, and drywall; technicians use PPE, follow IICRC and EPA recommendations, and document microbial levels before and after work so you can verify hazards were eliminated and your space is safe to reoccupy.
Prevention Tips
Prioritize interventions with clear, measurable steps: inspect gutters and downspouts twice a year, test your sump pump monthly, and replace braided supply lines every 5-7 years; for a focused comparison see Water Mitigation VS. Restoration: What is the Difference? Install shut-off valves on individual fixtures and smart leak detectors that alert you instantly. Thou should schedule professional inspections annually and create a water-emergency plan to limit repair time and costs.
- Check your meter overnight: turn off all water and watch for any movement to find hidden leaks.
- Maintain at least a 1-inch-per-foot slope away from the foundation and keep soil and debris below the siding.
- Test backflow preventers yearly and replace failing HVAC condensate pans or add secondary drains.
Reducing Risk of Water Damage
You can reduce risk by insulating exposed pipes with at least 1-inch foam, keeping crawlspaces above 55°F when possible, and replacing appliance supply lines every 5-7 years. Routinely clear gutters and ensure downspouts discharge at least 6 feet from the foundation. If you have a finished basement, consider a monitored sump pump and a wireless water sensor near appliances; early alerts cut response time and mold growth.
Maintenance Strategies
Adopt a maintenance calendar: check roof flashings and seals twice a year, flush water heaters annually to remove sediment, and exercise shut-off valves quarterly. Log dates and photos in an app so you and contractors know service history. Perform a seasonal walkthrough-inspect ceilings for stains, test toilets for silent leaks, and run the washing machine empty to verify hoses and drains.
For higher-risk properties, schedule professional plumbing and roofing inspections every 12 months and HVAC condensate-line checks every 6 months; replacing a $20-$50 supply hose prevents drywall and flooring repair bills that commonly exceed $5,000. Use remote-sensor plans that notify you and your mitigation contractor to keep response times under 24 hours and reduce secondary damage.
To wrap up
So when water invades your property, remediation contains and removes contaminants and health risks while restoration repairs, dries, and rebuilds to return your space to preloss condition; remediation focuses on safety and hazard control, restoration on recovery and finishing work, and you should engage qualified professionals who assess damage, mitigate risks, and restore structure and belongings efficiently.